

Creating beautiful circular joints (like those in woodworking, metalworking, or 3D modeling) can be simple if you follow the right techniques. Here’s a straightforward method for different applications:
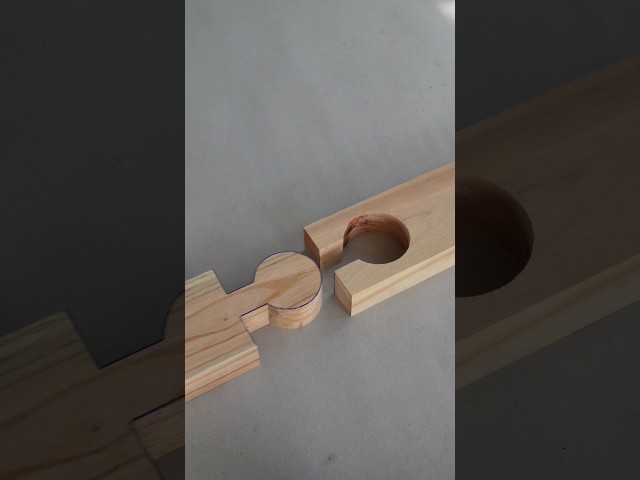
1. Woodworking (Circular Mortise & Tenon Joint)
Materials Needed:
Wood pieces
Forstner bit or hole saw
Chisel (optional)
Sandpaper
Steps:
Mark the Center Points – Decide where the circular joint will go and mark the center.
Drill the Hole – Use a Forstner bit (cleaner than a spade bit) to drill a hole in one piece.
Shape the Tenon – On the mating piece, mark a circle matching the hole diameter.
Cut slightly outside the line with a saw.
Sand or chisel down to fit snugly into the hole.
Glue & Assemble – Apply wood glue and press together. Clamp until dry.
Pro Tip:
For a wedged tenon, cut a slot in the tenon and insert a wedge after assembly for extra strength.
2. Metalworking (Circular Lap Joint)
Materials Needed:
Metal tubes/rods
Hole saw or drill bit
Welder or epoxy
Steps:
Mark & Drill – Use a hole saw to cut a circular hole in one metal piece.
Shape the Insert – File/sand the mating rod to fit tightly into the hole.
Join – Weld, braze, or use strong epoxy for a permanent bond.
Pro Tip:
For a bolted joint, drill a matching hole and secure with a nut & bolt.
3. 3D Modeling (Digital Circular Joints)
Tools:
Blender, Fusion 360, or Tinkercad
Steps (Blender Example):
Create Two Cylinders – One with a hole (Boolean modifier or direct cutting).
Align & Fit – Ensure the second cylinder fits snugly into the hole.
Add Details – Bevel edges for realism or use a "knurled" texture for grip.
Pro Tip:
Use "Shrinkwrap" modifier for flexible joints in animations.
4. Paper/Cardboard (Simple Circular Pivot)
Materials:
Cardboard, paper fasteners (brads)
Steps:
Cut Circles – Make two discs with matching center holes.
Insert Fastener – Push a brad through both and open the prongs.
Decorate – Paint or cover with decorative paper.
Bonus: Aesthetic Touches
Chamfer Edges – Soften edges for a polished look.
Contrast Materials – Combine wood/metal for visual appeal.
Inlay Work – Add a thin contrasting ring around the joint.
.jpg)
.jpg)
.jpg)


