

Absolutely! Wood bevel carving—whether for decorative edges, relief work, or geometric patterns—relies heavily on sharp tools, precise techniques, and the right machinery to streamline the process. Here’s a breakdown of the tools, machinery, and steps to make bevel carving efficient and enjoyable.
Essential Tools for Bevel Carving
Hand Tools (For Precision & Detailing)
Bevelled Chisels/Gouges
Fishtail chisels (for tight curves).
V-parting tools (for crisp angles).
Skew chisel (for clean, flat bevels).
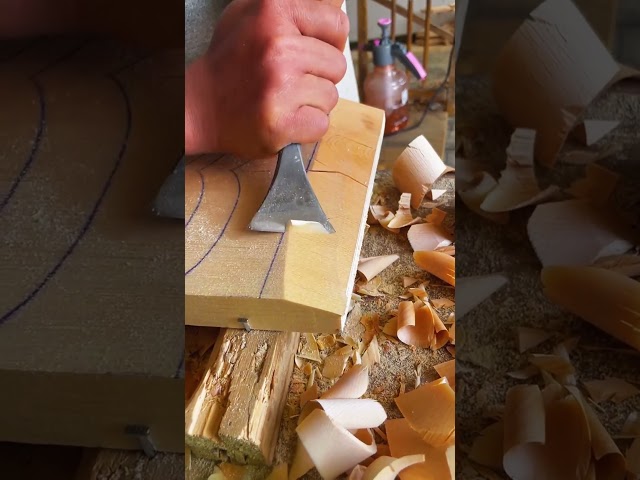
Carving Knives
Sloyd knife (general shaping).
Detail knife (for fine lines).
Mallet (for controlled strikes with chisels).
Marking Gauge & Bevel Protractor (for accurate angle measurement).
Power Tools & Machinery (For Speed & Consistency)
Rotary Tool (Dremel)
Use high-speed cutters or diamond bits for refining bevels.
Router (With Bevel Bits)
Palm router for small edges.
Fixed-base router with a 45° or 60° bevel bit for uniform edges.
Oscillating Spindle Sander
For smoothing curved bevels.
Bandsaw/Jigsaw
Rough-cutting bevels before refining.
CNC Router (For Complex/Repetitive Designs)
Ideal for intricate geometric bevel patterns.
Step-by-Step Bevel Carving Process
1. Design & Layout
Mark the bevel lines with a marking gauge or angle guide.
Use a protractor to ensure consistent angles (e.g., 30°, 45°).
2. Rough Shaping
For hand tools: Make relief cuts with a knife or saw to define the bevel edge.
For machinery: Use a bandsaw or router to remove bulk material.
3. Refining the Bevel
Hand-carving method:
Use a skew chisel or bevel-edged gouge to pare down the angle.
Work with the grain to avoid tear-out.
Power-carving method:
A router with a bevel bit creates uniform edges quickly.
A Dremel with a sanding drum refines curves.
4. Smoothing & Detailing
Hand-sand with graduated grits (120 → 400).
For hard-to-reach areas, use flexible sanding sticks or abrasive cords.
5. Finishing
Apply sanding sealer to stabilize the grain.
Finish with oil, wax, or lacquer for protection.
Pro Tips for Efficiency
✔ Sharp Tools Are Non-Negotiable – Dull tools cause tear-out and require more sanding. Use a honing guide or diamond stone for maintenance.
✔ Clamp Securely – Prevent slips with bench dogs, clamps, or a carving vise.
✔ Work in Layers – Remove material progressively to avoid overcutting.
✔ Jigs Save Time – A miter sled (for tablesaws) or router template ensures repeatability.
Best Woods for Bevel Carving
Basswood (soft, easy to carve).
Cherry/Walnut (harder but holds crisp edges).
Maple (for ultra-smooth finishes).
Avoid open-grained woods (like oak) for fine bevels unless sealed first.
Safety First!
⚠ Wear cut-resistant gloves when hand-carving.
⚠ Use push sticks/blocks with power tools.
⚠ Dust extraction is critical when sanding/routing.
Final Thought
With the right tools—whether hand-carving for tradition or using machines for efficiency—bevel carving becomes a satisfying blend of precision and artistry.
Want to explore a specific project (e.g., beveled boxes, relief panels)? Let me know—I’d love to help refine your approach! 🔪✨


