

Materials & Tools Needed:
Wood: A small block or branch of elm (elm has a nice grain and is good for carving).
Carving Knife/Whittling Tools: For shaping the body and details.
Woodturning Lathe (Optional): If you want to turn the body into a rounded shape.
Chisels/Gouges: For refining details.
Sandpaper (120-400 grit): For smoothing.
Wood Finish (Optional): Oil, wax, or varnish to protect the wood.
Step 1: Design Your Hedgehog
Sketch a simple hedgehog shape—round body, pointed snout, and spiky back.
Decide if you want a realistic or stylized look.
Step 2: Rough Shaping (Whittling)
Start with a Block: If using a lathe, turn a small sphere or oval shape for the body. If hand-carving, whittle the general shape.
Define the Face: Carve a tapered snout and mark where the eyes will be.
Shape the Body: Keep the underside flat if you want it to sit on a surface.
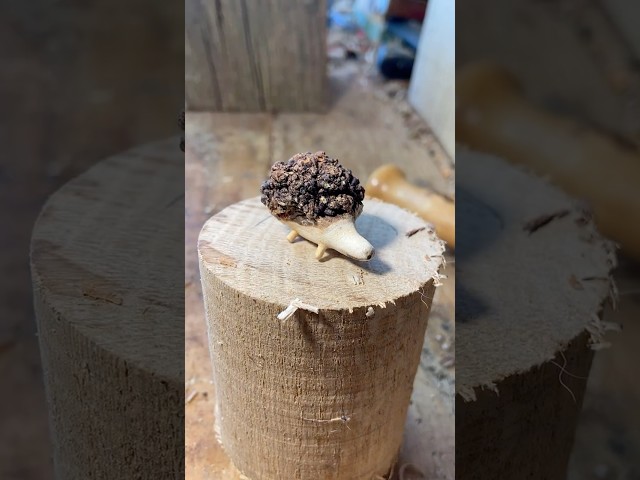
Step 3: Carving the Spines
Use a V-gouge or knife to create textured spikes along the back.
Work in layers, making small, shallow cuts to avoid splitting the wood.
Angle the cuts to follow the natural flow of the hedgehog’s spines.
Step 4: Refining Details
Add tiny ears and paws with delicate cuts.
Use a small drill or awl to mark the eyes and nose (or add glass/bead eyes later).
Step 5: Sanding & Finishing
Sand gently, being careful not to dull the spines.
Apply a natural finish like beeswax or linseed oil to enhance the wood grain.
Bonus: Hollow Form (If Turning)
If using a lathe, you could hollow out the belly and make it into a small box or keepsake holder!
Tips:
Elm can be fibrous, so keep your tools sharp for clean cuts.
Work slowly—hedgehogs are small, and mistakes can be tricky to fix.
If spines are too delicate, consider a "stylized" look with fewer, deeper grooves.
Would you like help with a specific part, like the turning process or spine detailing? Happy carving! 🦔🔪
.jpg)
.jpg)
.jpg)


