

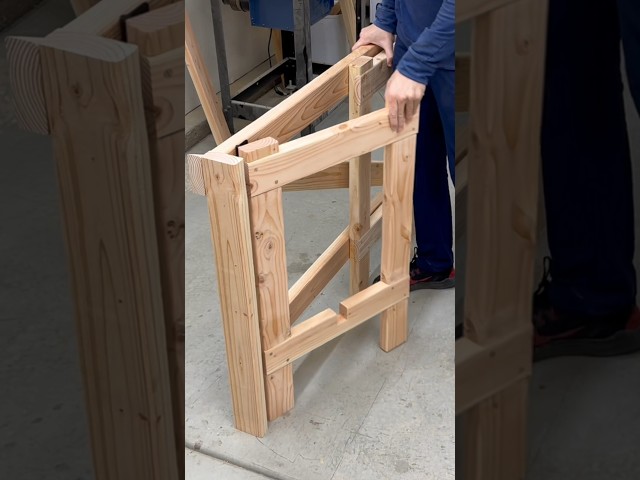
A folding workbench base is a fantastic beginner DIY project—it’s practical, space-saving, and requires basic tools. Here’s a simple design you can build in a weekend:
📌 Folding Workbench Base (Basic Design)
✅ Why It’s Great for Beginners:
✔ Minimal materials & tools
✔ Sturdy when open, folds flat for storage
✔ Can support a plywood top for a full workbench
📋 Materials Needed:
2x4 lumber (for legs and supports)
1/2" or 3/4" plywood (for the top, optional)
Hinges (x4) (heavy-duty, 3.5" or larger)
Screws (2.5" for framing, 1.5" for hinges)
Wood glue (optional, for extra strength)
Folding shelf brackets (optional, for extra support)
🛠 Tools Required:
Saw (circular or miter)
Drill & bits
Screwdriver
Measuring tape
Square (to check angles)
🔨 Step-by-Step Instructions
1️⃣ Cut the Legs & Supports
Legs: Cut four 2x4s to your desired height (e.g., 32"-36" for standing work).
Cross Braces: Cut two 2x4s (width = your desired bench depth, e.g., 18"-24").
2️⃣ Assemble the Leg Frames
Make two "A" frames by attaching legs to cross braces with screws.
Reinforce with wood glue if desired.
3️⃣ Attach Hinges for Folding
Place the two A-frames side by side.
Install heavy-duty hinges at the top (allows folding inward).
4️⃣ Add a Plywood Top (Optional)
Cut a plywood sheet (e.g., 24" x 48") for the work surface.
Secure it to the top cross braces with screws (or make it removable).
5️⃣ Stabilize & Test
Add folding brackets underneath for extra support.
Ensure it locks open and folds smoothly.
💡 Pro Tips:
Make it sturdier? Add a middle support beam under the plywood.
Need portability? Attach wheels to one side.
Want storage? Add a shelf between the legs.
This workbench is perfect for small workshops, garages, or balconies—fold it away when not in use!
Would you like a cut list with exact measurements or a more heavy-duty version? Let me know! 🔧😊


