

Creating strong square joints using mortise and tenon techniques is a time-tested woodworking method that ensures durability and precision. Below is a step-by-step guide to crafting a sturdy mortise and tenon joint:
Materials & Tools Needed:
Hardwood (e.g., oak, maple, or cherry for strength)
Chisels (sharpened) or a mortising machine
Marking gauge or knife
Mallet
Tenon saw or backsaw
Router (optional for mortising)
Square or combination square for accuracy
Clamps
Step-by-Step Process:
1. Design & Marking
Determine the size of the mortise (hole) and tenon (protruding piece). A good rule is:
Tenon thickness = ⅓ to ½ the thickness of the stock.
Tenon width = ⅔ the width of the rail (horizontal piece).
Use a marking gauge or knife to scribe precise lines for both mortise and tenon.
Square all lines around the workpiece for accuracy.
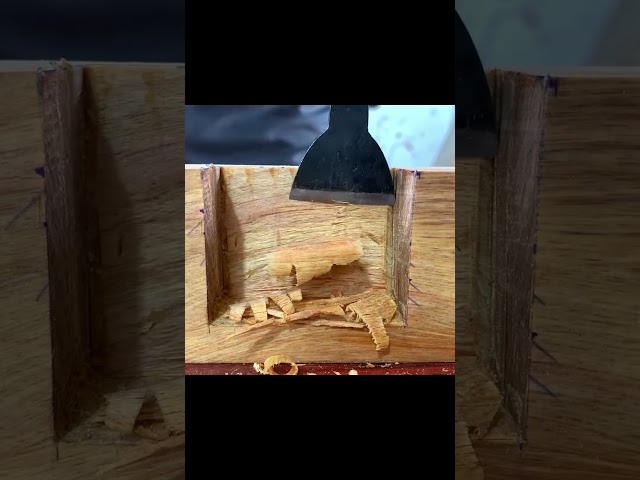
2. Cutting the Mortise
Option A (Hand Tools):
Drill out most of the waste with a drill press or brace and bit.
Clean up the sides and ends with a sharp chisel, ensuring straight, square walls.
Option B (Power Tools):
Use a mortising machine or router with a straight bit for clean, precise cuts.
Check depth (should match tenon length) and squareness frequently.
3. Cutting the Tenon
Use a tenon saw to cut the shoulders first (cross-grain cuts).
Make the cheek cuts (along the grain) to form the tenon.
Test-fit the tenon into the mortise—it should slide in snugly but not too tight.
Adjust with a chisel or shoulder plane if needed.
4. Fine-Tuning the Fit
The joint should fit without excessive force.
A slight wedging effect (tapered tenon) can improve tightness.
Ensure shoulders sit flush against the mortised piece.
5. Gluing & Assembly
Apply wood glue inside the mortise and on the tenon.
Assemble the joint, ensuring square alignment.
Clamp firmly and wipe off excess glue.
Let dry completely (overnight for best results).
6. Reinforcement (Optional)
For extra strength:
Add a drawbore pin (offset peg) for mechanical locking.
Use a wedge in a through-tenon for decorative yet strong joints.
Tips for Success:
✔ Grain Direction – Ensure the tenon runs with the grain for strength.
✔ Avoid Tearout – Use a backing board when chiseling.
✔ Test Fit – Dry-fit before glue to confirm alignment.
✔ Squareness Matters – Check with a square at every stage.
Common Mistakes to Avoid:
❌ Loose Tenon – Results from oversizing the mortise or undersizing the tenon.
❌ Misaligned Shoulders – Leads to gaps; always cut shoulders first.
❌ Splitting Wood – Avoid forcing the tenon; ease the fit with fine adjustments.
.jpg)
.jpg)
.jpg)


