

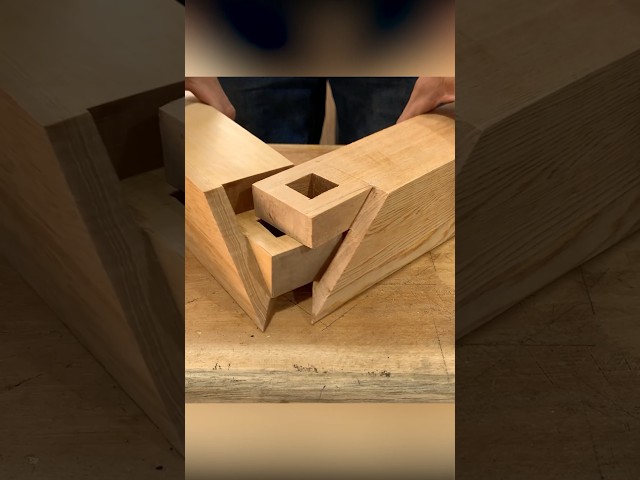
A strong mortise-and-tenon joint is one of the most reliable and aesthetically pleasing woodworking connections. Here’s how to create an amazing wood connection with a robust mortise:
1. Types of Mortise-and-Tenon Joints for Strength:
Through Mortise-and-Tenon – The tenon passes entirely through the mortise and is wedged or pinned for extra strength.
Haunched Mortise-and-Tenon – Adds a small shoulder (haunch) to prevent twisting, common in door frames.
Wedged Mortise-and-Tenon – The tenon is splayed and wedged to create a mechanical lock.
Tusk Tenon – Uses a tapered wedge for knockdown strength, often seen in timber framing.
Double/Twin Tenon – Two smaller tenons instead of one large one for wider boards (e.g., workbench legs).
2. Key Steps for a Strong Mortise:
Precise Layout – Use a marking gauge and square for accuracy.
Mortise Depth – Typically ⅔ to ¾ the thickness of the mortised piece.
Tenon Thickness – About ⅓ the thickness of the tenon piece (e.g., ¼" tenon in ¾" stock).
Tight Fit – The tenon should slide in snugly without forcing but not be loose.
3. Tools for Cutting a Mortise:
Chisel & Mallet (Traditional hand-cut method)
Mortising Machine (Hollow-chisel mortiser)
Drill Press + Chisel (For rough removal)
Router with Mortising Jig (Most precise for repeatability)
Festool Domino (Fast, loose-tenon alternative)
4. Reinforcing the Joint:
Glue (PVA or Epoxy) – Standard wood glue works, but epoxy fills gaps better.
Mechanical Fasteners – Drawbore pins, wedges, or screws for extra hold.
Floating Tenons – Domino or loose tenons for alignment ease.
5. Pro Tips for Maximum Strength:
Grain Alignment – Ensure the tenon grain runs long for strength.
Avoid Short Grain – Leave enough material around the mortise.
Clean Cuts – Sharp tools prevent tear-out and ensure tight fits.
Dry Fit First – Test before glue-up to avoid surprises.
.jpg)
.jpg)


